
How to Remove Solder Bridges on a PCB Safely
A solder bridge happens when excess solder accidentally connects two pads, pins, or traces that should remain separate. In PCB repair and microsoldering, solder bridges are common when working with fine-pitch components, connectors, IC pins, or small phone motherboard parts.
If not removed properly, a solder bridge may cause short circuits, unstable operation, or further board damage. The good news is that most solder bridges can be removed safely with the right tools, proper heat control, and a careful repair workflow.
This guide explains how to remove solder bridges on a PCB safely using SATZOZZ Desoldering Wick, NC559 No-Clean Soldering Flux Kit and proper repair handling.
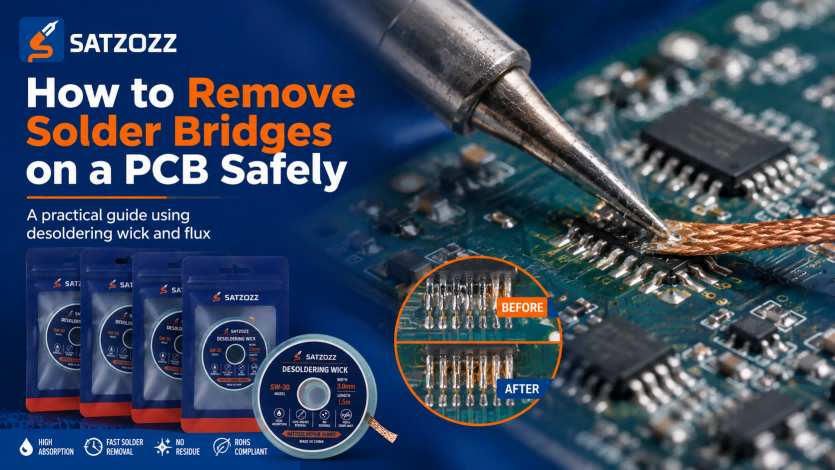
Desoldering wick and no-clean soldering flux are practical tools for removing solder bridges and cleaning PCB pads during electronics repair.
Quick answer: To remove solder bridges on a PCB safely, apply a small amount of flux to the bridged area, place desoldering wick over the excess solder, heat the wick with a soldering iron, let the braid absorb the solder, then lift the wick and inspect the pads. Use controlled heat and avoid dragging the wick across the PCB.
People Also Ask About Removing Solder Bridges
What is a solder bridge on a PCB?
A solder bridge is an unwanted connection made by excess solder between two or more pads, pins, or traces. It can create a short circuit and should be removed before the board is powered.
What is the best tool to remove solder bridges?
Desoldering wick is one of the best tools for removing solder bridges because it absorbs excess molten solder with good control. Soldering flux can also help the solder flow into the braid more smoothly.
Can solder bridges damage a PCB?
Yes. A solder bridge can create an electrical short between pads or pins. If the board is powered while a bridge remains, it may cause malfunction or damage components.
Can I remove solder bridges without desoldering wick?
In some cases, solder bridges can be corrected with flux and a clean soldering iron tip, but desoldering wick gives better control when excess solder needs to be absorbed from small pads or fine-pitch pins.
Should I use flux when removing a solder bridge?
Yes. Flux helps solder flow more smoothly and makes it easier for desoldering wick to absorb the excess solder. Use only a small amount to avoid excess residue.
What Causes Solder Bridges?
Solder bridges are usually caused by too much solder, poor heat control, insufficient flux, or working with very small component spacing. They are especially common in fine-pitch soldering, phone motherboard repair and SMD component rework.
Common causes include:
- Using too much solder on small pads
- Dragging solder across IC pins
- Working without enough flux
- Using an oversized soldering iron tip
- Overheating the repair area
- Poor visibility during microsoldering
Tools Needed to Remove Solder Bridges
Desoldering Wick
Desoldering wick absorbs excess solder from the bridged area. SATZOZZ Desoldering Wick is available in 1.0mm to 3.0mm widths for different PCB repair tasks.
Soldering Flux
Flux helps solder move more smoothly and improves solder absorption into the wick. SATZOZZ NC559 Flux Kit is suitable for PCB repair and fine electronics rework.
Soldering Iron
A soldering iron provides the heat needed to melt the solder bridge. Use a suitable tip size and controlled temperature for the repair area.
Precision Tweezers
Precision tweezers help hold, position or remove small parts around the repair area. SATZOZZ S-05U Tweezers are useful for delicate PCB repair work.
How to Remove Solder Bridges on a PCB Step by Step
Step 1: Inspect the Solder Bridge
Before applying heat, inspect the bridged area carefully. Identify which pins or pads are connected by excess solder. If possible, use magnification to confirm the bridge location.
Step 2: Apply a Small Amount of Flux
Apply a small amount of flux to the solder bridge. Flux helps the solder reflow and makes it easier for the desoldering wick to absorb excess solder.
Step 3: Choose the Correct Desoldering Wick Width
Use a wick size that matches the repair area. For very small pads or fine-pitch pins, choose a narrow wick. For larger solder joints, a wider wick can absorb solder faster.
Step 4: Place the Wick Over the Bridge
Place the desoldering wick directly on top of the solder bridge. Do not drag it across the board. The goal is to let the braid absorb the solder, not scrape the PCB surface.
Step 5: Heat the Wick with a Soldering Iron
Touch the soldering iron tip to the wick above the bridged solder. Once the solder melts, it should move into the copper braid. Keep the heat controlled and avoid staying on the pad for too long.
Step 6: Lift the Wick Carefully
After the solder is absorbed, lift the wick and soldering iron away carefully. Do not pull the wick while the solder is solid, because this may stress the pad.
Step 7: Inspect the Pads Again
Check whether the bridge has been removed. If a small amount of solder remains, repeat the process with a clean section of wick. Cut off the used braid before continuing.
Choosing the Right Desoldering Wick Width
Using the correct wick width helps improve solder removal and reduces unnecessary heat exposure. SATZOZZ Desoldering Wick is available in five widths:
| Model | Width | Best Use |
|---|---|---|
| SW-10 | 1.0mm | Ultra-fine pads, small SMD work and delicate repair |
| SW-15 | 1.5mm | Fine-pitch pins, phone motherboard repair and small solder bridges |
| SW-20 | 2.0mm | General PCB repair and common solder bridge removal |
| SW-25 | 2.5mm | Medium pads and larger repair areas |
| SW-30 | 3.0mm | Large solder joints and stronger solder removal tasks |
View available models on the SATZOZZ Desoldering Wick product page.
Common Mistakes When Removing Solder Bridges
1. Using Too Much Heat
Too much heat can lift pads or damage nearby components. Use enough heat to melt the solder, but avoid keeping the iron on the area longer than necessary.
2. Dragging the Wick Across the PCB
Desoldering wick should absorb solder, not scrape the board. Dragging the wick may damage pads or solder mask.
3. Using a Wick That Is Too Wide
A wide wick can transfer too much heat to a small repair area. For fine-pitch work, use a narrow wick such as 1.0mm or 1.5mm.
4. Reusing Used Wick
Used braid does not absorb solder efficiently. Cut off the solder-filled section and continue with a clean part of the wick.
5. Skipping Final Inspection
After removing the bridge, always inspect the area. A tiny solder connection may still remain between pins, especially on fine-pitch components.
Recommended SATZOZZ Tools for Solder Bridge Removal
SATZOZZ provides practical microsoldering tools and PCB repair supplies for repair technicians, electronics maintenance users, repair shops and wholesale buyers.
- SATZOZZ Desoldering Wick — for solder bridge removal, pad cleaning and solder removal.
- NC559 No-Clean Soldering Flux Kit — for smoother solder flow and PCB rework.
- S-05U Ultra-Fine Precision Tweezers — for precise handling of small components.
Need Tools for Solder Bridge Removal?
Explore SATZOZZ Desoldering Wick, NC559 Flux and precision tweezers for PCB repair, electronics maintenance and microsoldering work.
View SATZOZZ Repair Tools →FAQ
What is the safest way to remove a solder bridge?
The safest way is to use flux, desoldering wick and controlled heat. Place the wick on the bridge, heat it briefly, let the braid absorb the solder, and inspect the pads afterward.
Can I use desoldering wick on small PCB pads?
Yes. Use a narrow desoldering wick such as 1.0mm or 1.5mm for small pads and fine-pitch repair work.
Do I need flux to remove a solder bridge?
Flux is strongly recommended because it helps solder flow and makes it easier for the wick to absorb the excess solder.
Can a solder bridge cause a short circuit?
Yes. A solder bridge can connect two points that should not be connected, creating a short circuit or unstable board behavior.
Why does solder bridge happen during PCB repair?
Solder bridges often happen because of too much solder, poor heat control, insufficient flux, oversized soldering tips or very small spacing between component pins.
Conclusion
Removing solder bridges on a PCB safely depends on the right repair method. Use a small amount of flux, choose the correct desoldering wick width, apply controlled heat, and inspect the repair area carefully after solder removal.
For repair technicians and electronics maintenance users, SATZOZZ Desoldering Wick is a practical tool for solder bridge removal, PCB pad cleaning and daily solder removal work.